¶ LightBurn Software Operation Guide - Tyvok P2
¶ 📥 Download Configuration File
¶ 1. LightBurn Connection
To connect the device and import the configuration file, follow the steps below:
-
Open the LightBurn software
-
Connect the device to a power source
-
Use a Type-C data cable to connect the device to your computer
-
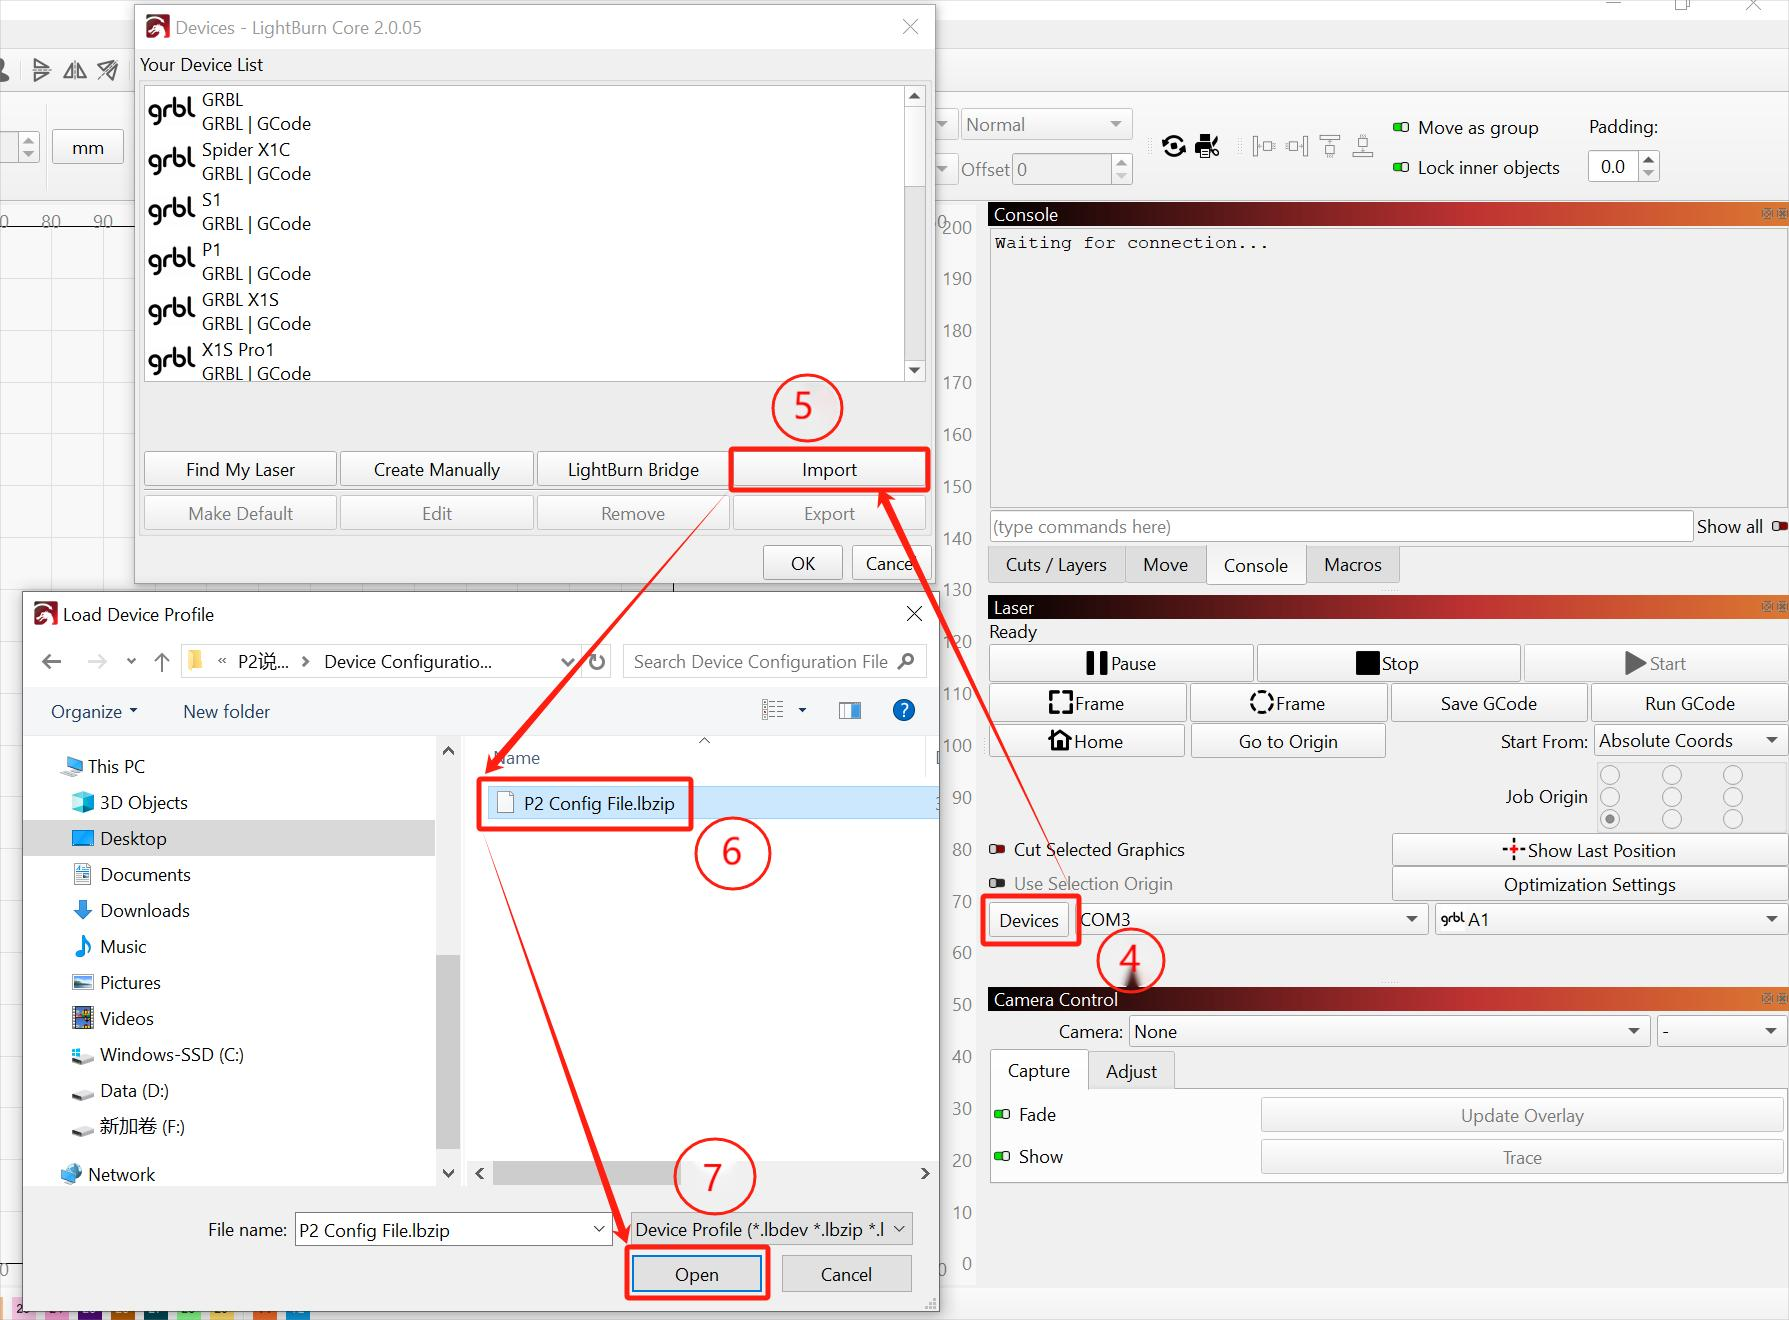
From the right-side toolbar, select "Devices"
-
Click "Import"
-
Choose the configuration file "P2ConfigFile.lbzip"
-
Click "Open" to complete the import
-
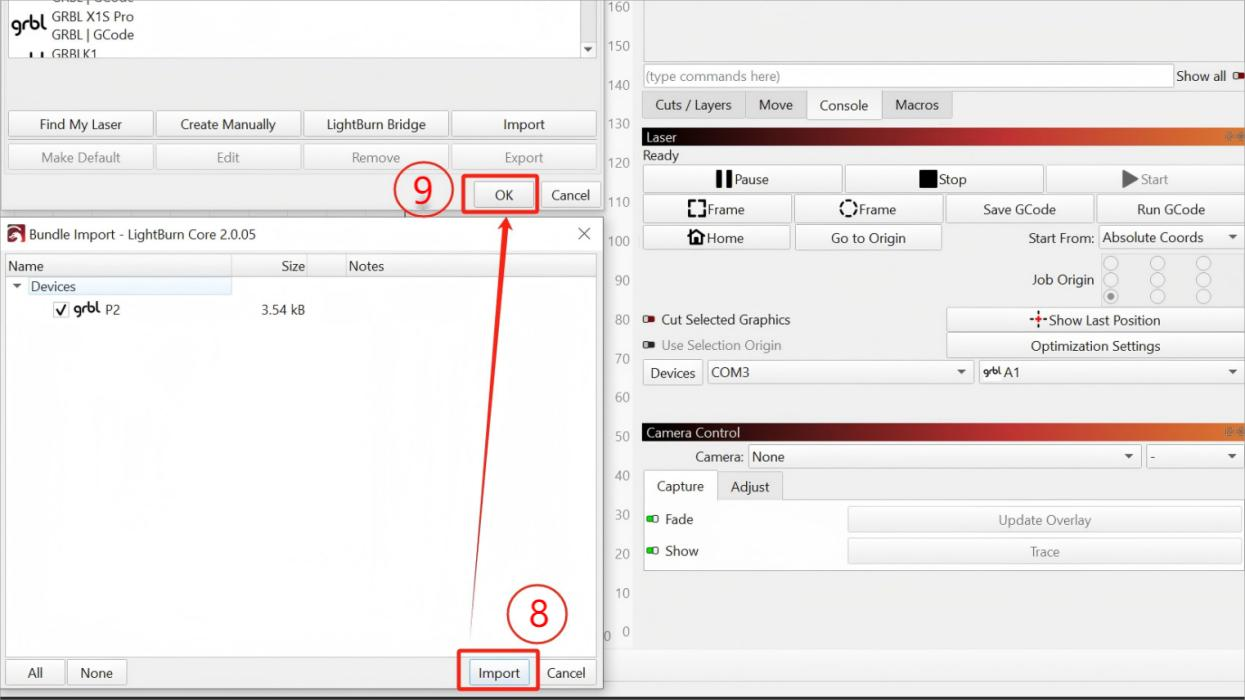
Click "Import"
-
Click "OK" to confirm
-
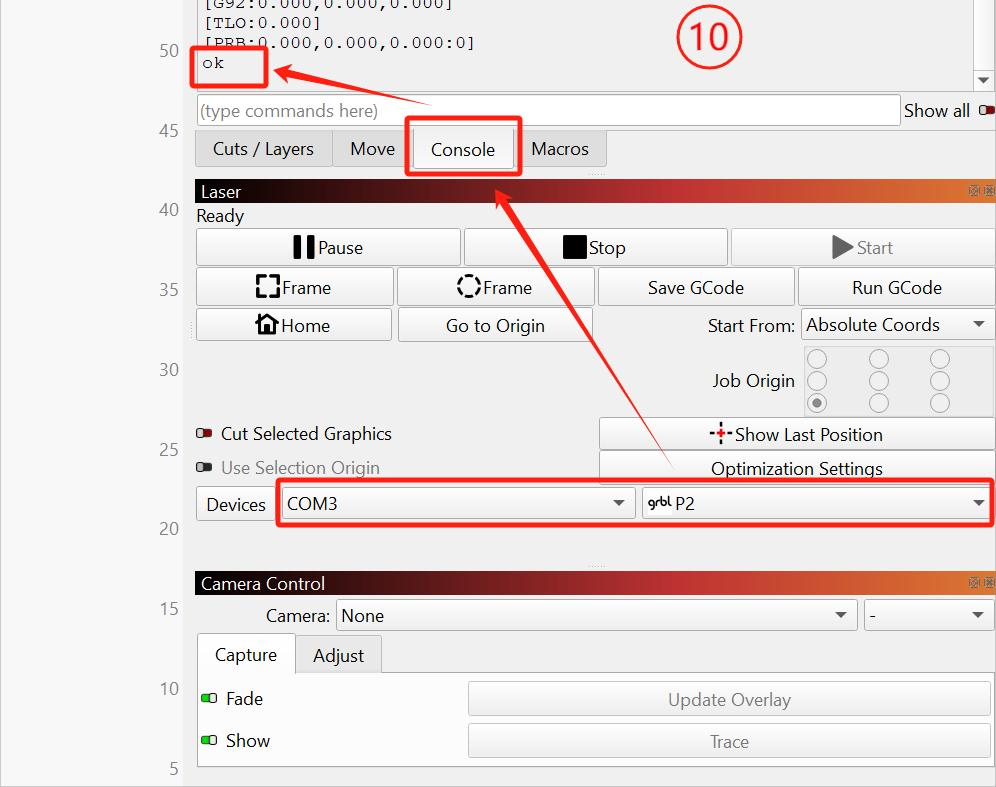
After the configuration file is successfully imported, click the "Console" tab. When "OK" appears in the console window, it indicates that the device has been successfully connected to the computer. You can now begin operating the machine.
¶ 2. File Import in LightBurn
To import a file in LightBurn, follow the steps below:
-
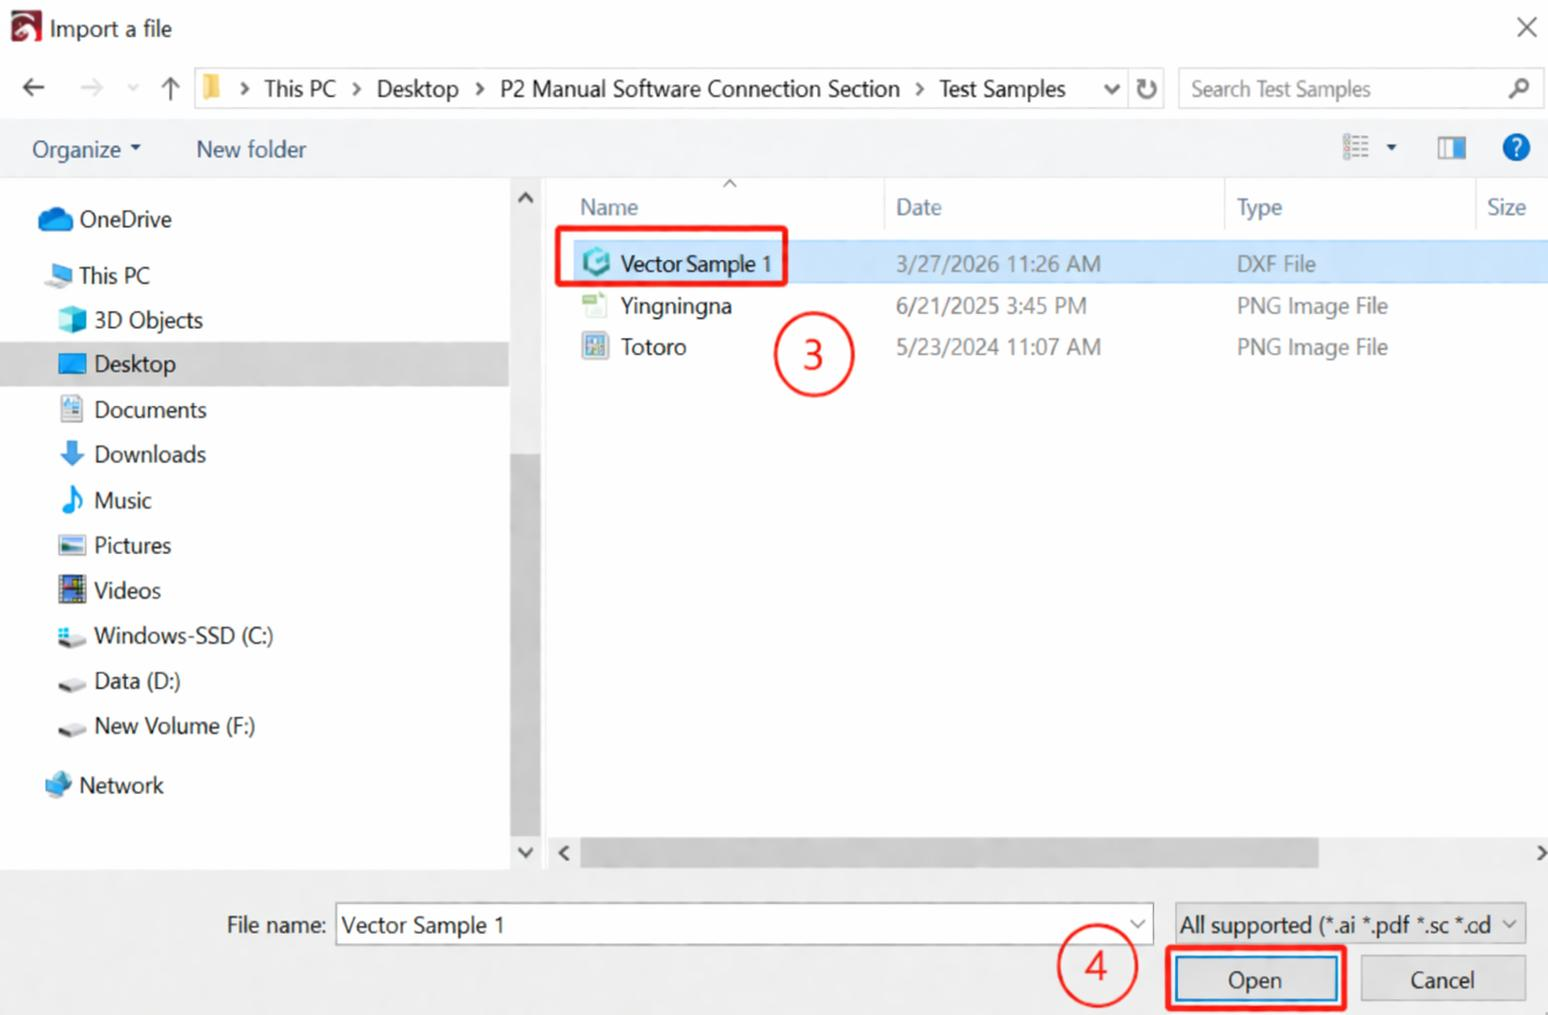
From the top menu bar, select "File".
-
From the dropdown menu, select "Import".

-
Select a file (supported formats include: .ai, .pdf, .svg, .dxf, .hpgl, .plt, .bmp, .jpg, .gif, .png, .tif, .tiff, .tga, .webp, .gc, .gcode, .rd, .sc, .scpro2, .lbrn, .lbrn2, etc.).
-
Select "Open" to import the file.
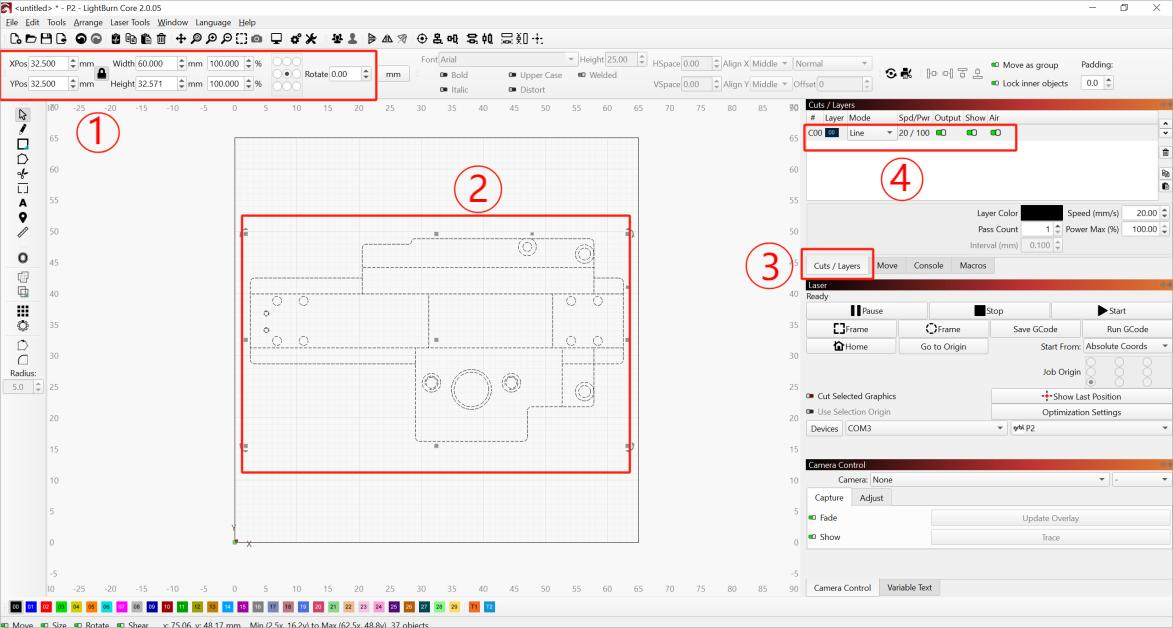
¶ 3. Engraving Settings and Operation
To configure engraving parameters and perform engraving, follow the steps below:
-
Adjust the position, size, scale, and rotation of the design.
-
Ensure that the design does not exceed the working area (65 mm × 65 mm).
-
Select the "Cuts/Layers" panel.
-
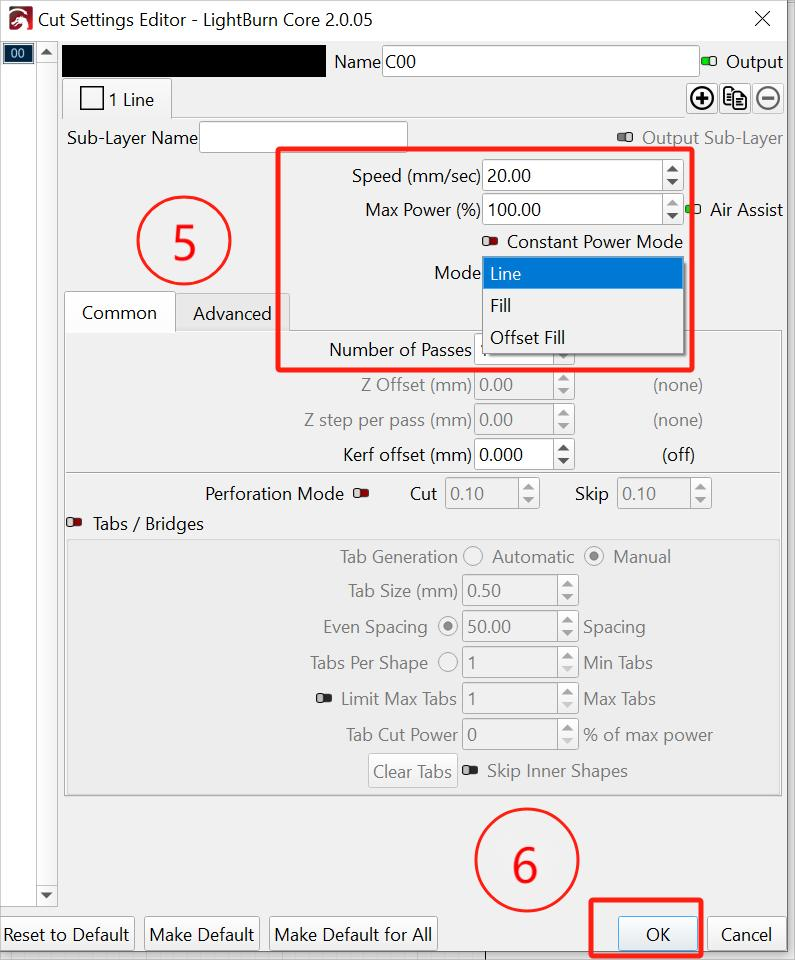
Double-click the desired layer using the left mouse button to open the layer settings.
-
Set the engraving speed, laser power, and engraving mode.
-
Select "OK" to confirm the settings.
-
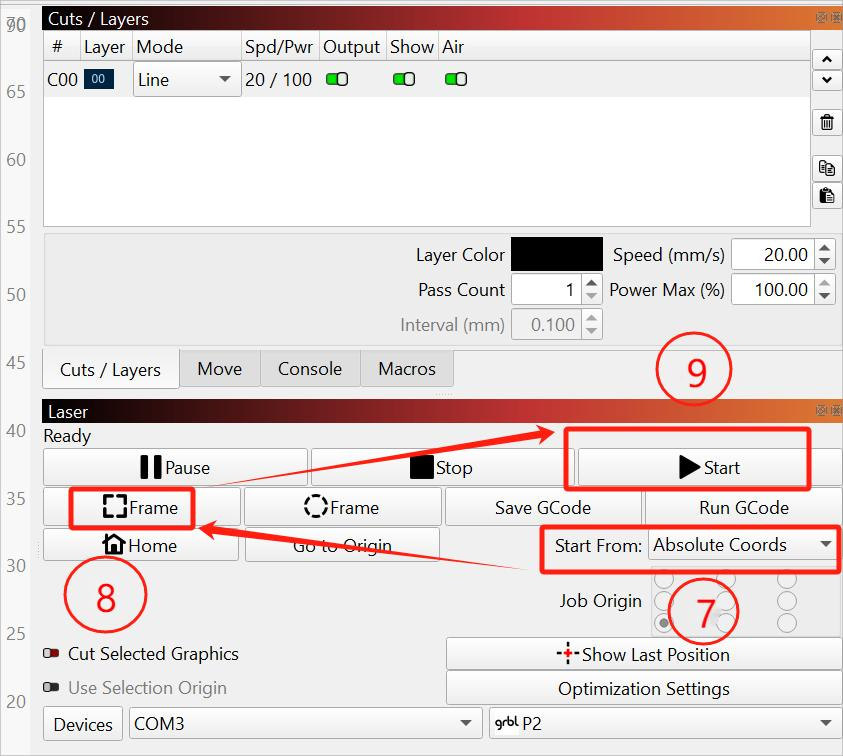
Set the start position to "Absolute Coords".
-
Select "Frame". The machine will outline the engraving area on the workpiece for approximately 3–5 seconds.
-
After confirming the positioning is correct, select "Start" to begin engraving.
Note:
- Ensure the device remains stable during operation.
- Do not move or touch the working area while engraving is in progress.
- Remove the workpiece only after the engraving is complete and the laser emission has stopped.